
Pot holders make a fantastic addition to any kitchen. Whether you like to bake, meal prep, or anything in between, a pot holder is a super useful tool when dealing with anything hot in your kitchen.
They also make a great gift for almost any occasion – just change up the fabric to suit your theme. After all, who doesn’t love a thoughtful homemade gift?
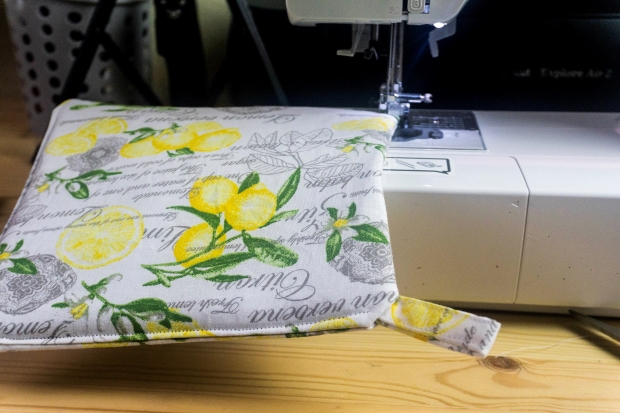
Today we are going to walk you through how to make a basic square pot holder with this simple and easy pot holder tutorial. We’ll share with you some of our preferred materials and then walk through the steps to make a simple pot holder like the lemon themed one you see above.
Tutorial: Learn To Sew A Simple DIY Pot Holder
This post contains affiliate links, which means that I may make a commission on purchases and/or clicks (at no extra cost to you).
A pot holder is a great idea for a first project if you’re new to sewing. It’s also a quick and simple item to whip up if you’re more seasoned. Whatever you’re experience level, we hope you enjoy this easy DIY pot holder tutorial.
Materials And Equipment
- 2 pieces of quilting cotton fabric (10″ x 10″ square)
- 2 pieces of Pellon 975 Insul-Fleece (10″ x 10″ square)
- Thread to match
- Fabric Scissors
- Sewing Machine
- Optional: 2 pieces of Nature’s Touch 100% Natural Cotton Batting (10″ x 10″ square)
Recommended Materials For Sewing A DIY Pot Holder
If you already have everything you need, feel free to skip ahead to the pot holder tutorial steps. However, if you’re looking for some suggestions, here are some of our recommended materials for creating this easy pot holder:
Pre-Cut Quilting Cotton Squares

If you like to mix it up with your fabric, this variety pack of 10″ quilting cotton squares is a great option.
It’ll save you time since you won’t have to cut your own squares. Plus, this pack includes many different colors and patterns so you’re sure to find something that you like.

If you’d prefer to use the same patterned fabric for your pot holder, a pack of 10″ squares like this one from Riley Blake Designs is another great option.
There are 42 squares in this pack, so it’s perfect if you plan to make multiple pot holders to give as gifts and want to keep your design consistent.
Pellon 975 Insul-Fleece

Insul-Fleece helps to reflect heat or cold back to its source, which means that it helps keep hot things hot longer and cold things cold longer.
It is can be easily sewn through and, once sewn, is machine washable – perfect for your pot holder.
100% Cotton Thread

For this project, you’ll want a cotton thread that matches your chosen fabric.
We love the 100% cotton thread sets by Connecting Threads. They’re great quality and come in a range of options from your standard black/white, to brights, neutrals, pastels, and more.
Fabric Scissors

Good quality fabric scissors like these knife edge dressmaker’s shears will make your job so much easier, especially if you’re trying to cut through multiple layers.
The bent handle design on these will help keep the fabric flat as you cut it, for a more accurate line.
Rotary Cutter

A rotary cutter is another good tool to use for cutting straight lines. The main benefit of a rotary cutter is that you don’t get hand fatigue like you can while using scissors. However, the downside is that you will also need to purchase a cutting mat so that you don’t damage your tabletop when using a rotary cutter.
Cotton Batting

Insul-Fleece is not heat proof or fire resistant, so it’s a good idea to add an extra layer or two of cotton batting between the outer fabric and Insul-Fleece.
We like Nature’s Touch 100% Cotton Batting. Note that cotton batting may shrink. To avoid this, soak the batting in hot water for 20 minutes before use.
Tutorial Steps: How To Make A Pot Holder
Step 1: If you don’t have pre-cut squares of fabric, your first step is to cut these out in your chosen fabric. If you’ve purchased pre-cut squares, skip ahead to Step 2.
When making homemade pot holders, you can cut them any size you’d like. We recommend you do 8″ x 8″ or 10″ x 10″ for your first project, but you could also do smaller squares to make a mini potholder. Whatever you choose, just make sure when you cut the material that the fabric is square.

Step 2: On a flat work surface, cut 2 squares each from both the Insul-Fleece and the cotton thermal batting (if you chose to use batting).

Step 3: Assemble the layers. The order should be as follows:
- Insul-Fleece, with the silver side facing up.
- Cotton batting (optional).
- Cotton fabric, with the printed side facing up.
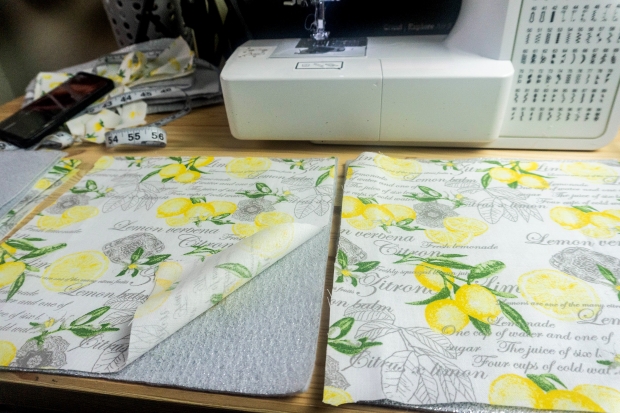
Step 4: At this stage you should have 2 sets of material, each with a square of cotton fabric, cotton batting, and Insul-Fleece.
Take both sets of material and place them together with both pieces of printed cotton fabric facing each other. You should now see the white sides of the Insul-Fleece facing out.

Step 5: Keeping all 6 squares (4 if you’re not using cotton batting) together and stitch all the way around the square, leaving a 1 1/2 to 2 inch opening. This will be used to flip the fabric right side in after stitching.

Step 6: After stitching all the way around, flip fabric right side in so that the raw edges are inside the pot holder. Top stitch all the way around closing the hole while top stitching.
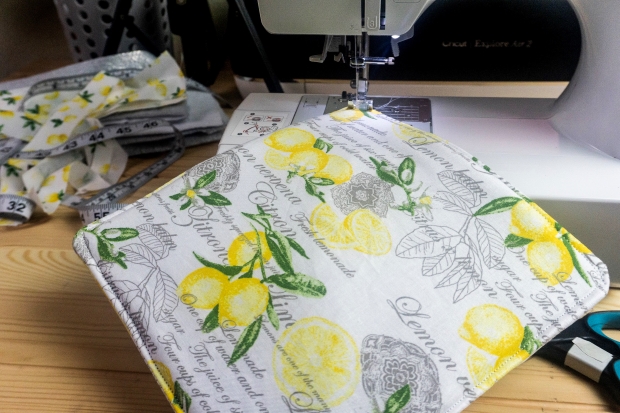
Step 7: After top stitching all the way around, the next step is to run a top stitch diagonally from corner to corner. This is going to add the nice quilted look and keep your Insul-Fleece and fabric from separating when washing.

Making A Hanging Hook Loop (Optional)
If you would like to make a fabric loop to hang your pot holder, take a small piece of fabric the length you’d like the hook to be. Fold the two edges inward and press, then fold in half and press. This way no edges are showing.
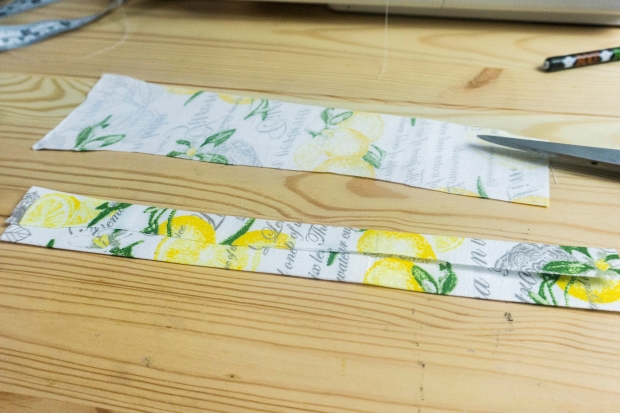
Top stitch down each side of the fabric.

Make a loop and place in between the printed fabrics with the loop face into the pot holder. The ends should be sticking out of the edge of the pot holder.
You will do this before stitching around the first time when your white pieces are facing outward, so when flipping the pot holder right side in you will have the hanging loop on the corner of the fabric between the two printed pieces of fabric.

One you have stitched around with the white sides of the Insul-Fleece facing out, flip the pot holder right side in and continue from Step 6 above.
The Finished Product
And here it is – the finished pot holder. Now you’re all set to whip up some of these beauties next time you need a gift for a housewarming, Christmas, Mother’s day, a birthday, or any other occasion. Cute DIY pot holders make a wonderful gift!

Final Thoughts
We hope you enjoyed this simple DIY pot holder tutorial.
Homemade DIY potholders are not only good for gifting, they’re also a fantastic addition to your own kitchen and a great way to use up any smaller pieces of scrap fabric that you might have sitting around from other projects.
If you’re new to sewing, this is a great easy project to start with since it’s so simple and doesn’t require a lot of materials. After you complete this project, why not try making some matching oven mitts or cast iron handle covers to go with your pot holder?
We also think that sewing is a great skill to have (or learn) if you’re trying to live a simpler, more sustainable life as you can learn to make your own clothing, mend or re-purpose older clothing, and create a bunch of other great projects.
Frequently Asked Questions (FAQ)
Q: What’s the best way to clean my pot holder?
A: Most pot holders can be machine washed on a delicate cycle and hung to dry, but we recommend checking the care instructions on your fabric before washing. If you’re unsure, it’s always best to err on the side of caution and wash by hand.
Q: Can I use a different type of fabric for my pot holder?
A: Yes! Some other great options for pot holder fabric include quilting cotton, linen, or canvas. Just make sure to choose a fabric that can withstand heat.
Q: Do I have to use Insul-Fleece in my pot holder?
A: While we think it definitely adds to the pot holder’s function, you can absolutely omit the Insul-Fleece if you’d prefer. Just be aware that your pot holder will then only be good for decorative purposes.
Q: Can I make a pot holder without a sewing machine?
A: Yes! If you don’t have access to a sewing machine, you can hand stitch your pot holder together. Just be aware that it will take longer to complete.
Q: How can I make my pot holder more decorative?
A: If you want to add a bit of extra flair to your pot holder, try embellishing it with some embroidery, fabric paint, or bias tape. Embroidering your initials is a great way to add a personal touch to this simple project.